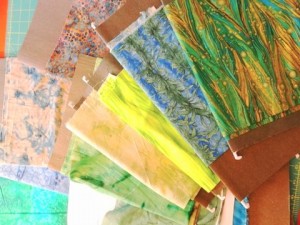
fabric swatches
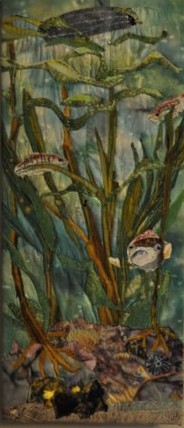
As is so often the case, visiting the stash of fabrics inspired my piece, “Kelp Bass.” When I came across the fabrics with the kelp patterns, I envisioned a composition that would show a fish’s eye view up from the sea floor, through the kelp, to a vague suggestion of a fishing boat’s hull on the surface. So I auditioned fabrics which suggested rocks, water, fish scales.
I made a rough sketch of how the design might go. A big bass would be my focal point and the kelp, other fish and boat would draw the eye around the composition. A good rule of thumb is to divide the surface into thirds, both horizontally and vertically, then place the center of interest at the intersection of two of the lines. I didn’t want my bass to lead the eye off the edge or be right smack in the middle anywhere.
Other design decisions followed. I needed to settle on a palette of colors and broadly consider values. The surface would be the lightest and shadows would be dictated by the downward track of the sunlight. Colors at the surface would be warmer; at the bottom more cool. The underbellies of fish are always light, an evolutionary feature to make them less visible from below against the surface brightness and objects close at hand would, of course, appear larger than those at a distance. The focal point would have the highest contrast of values and the most detail. Lines of the kelp strands would lead the eye down to the rocks, up through the fish to the boat, and back around.
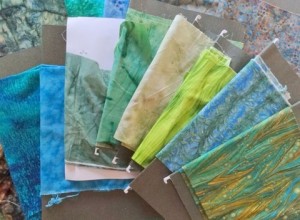
and more swatches
I found images of kelp bass and painted mine with acrylic on plain white fabric backed with stabilizer. I left the edges of the fabric way beyond the edges of the fish images so that I could easily machine embroider details before cutting out the fish. Then I started to experiment with twisted strands of fabric to make the twining kelp. I needed to anchor the tall plants with ‘holdfasts’ in rocks, so I built up a surface of planes, shadows, and textures with batik fabrics. I carefully arranged the rocks, the kelp, and the fish before fusing them to the base of a pieced water-colored background. I fashioned a hazy, neutral-colored boat hull and the suggestion of an outboard motor. Then I laid out additional kelp strands as they might lay on the water surface around the boat. Fish would see no break between water and sky except for that interloper, the boat. A final inspiration was to extend a metallic line of stitching from the boat down into the kelp to suggest a fishing line.
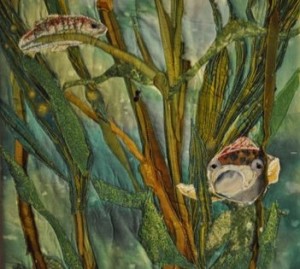
fish and kelp
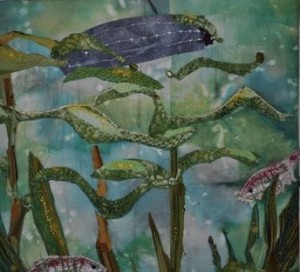
Top of the quilt showing the bottom of the boat and the tops of the kelp
With all these pieces fused in place, I layered batting and backing behind the quilt’s surface, leaving considerable excess so I could square the image later. I like to use a thin, fusible craft batting to eliminate puckers and folds. Nevertheless, I pinned the layers at intervals, knowing I would probably need to smooth the fabric as I quilted.
I had already machine embroidered the fish, but now I emphasized the three-dimensional effect by quilting outlines around all the figures. I straight-stitched first around all the shapes, including the kelp and rocks, checked for puckers, then went back in to machine embroider textures, shadows, and highlights. I am not a perfectionist. I figure that remaining puckers could be light bending through the water current. Where the kelp needed to stand out more from the water, I used deColorant judiciously to lighten the water background. Where fronds needed highlighting or shadowing I changed the colors of my embroidery thread.
The finished piece
Finally, I squared the fabric and applied a thin binding. I have found that thick batting at these edges makes clean, mitered corners difficult. I then stretched the completed quilt across stretcher bars as one would stretch a canvas for a painting. This insures a squared piece and can be fashioned to almost infinite dimensions, since the bars are sold in art stores in many lengths. I simply used a staple gun to fasten down the edges. I’ve noticed that some quilt artists go so far as to attach an additional strip of fabric all around the edge of the piece to insure a neat finish. After fastening a hanging wire on the back about one third of the way down, it was ready to show off.

Darlene Barr
Darlene is a relatively new resident of Sonoma County, having moved here in January, 2009, from San Diego where she taught high school English. She has been painting in watercolors and making art quilts for about fifteen years. She studied watercolors with Don Moore, but is mostly a self-taught art quilter. She lives in Healdsburg with her best buddy, an old Jack Russell terrier named Cricket.
Click here for the next article next article