There is more than one way to skin a cat– and to make a felted object. Producing felt by the “moisture, heat and agitation” method is well known. However, for finer work and three dimensional pieces, needle felting takes the lead. Needle felting can be done by hand with one barbed needle or with a few barbed needles in a holder. The upside is that no water is involved. The downside–these needles can be lethal!
Needle felting is done by sticking the special barbed needle into layers of wool or other fiber and pulling out–thus tangling the fiber together and making it into one piece. As with traditional felt, once felted it is impossible to reverse the process. This technique is especially good for three dimensional objects as you can build the thickness of the piece and sculpt the details you wish to add easily and precisely.
Another way to needle felt is by using the embellisher. Several companies make an embellisher or needle punch machine: Babylock, Janome,Singer, Husky and Pfaff to name a few. There are also attachments made for some sewing machines. My experience has been with the Babylock 7 needle machine.
The embellisher is used mainly to add detail by appliqueing fiber, yarn, ribbon or supplementary material to a base fabric. This is fun and fairly quick. The best part is that it doesn’t use thread!
I have appliqued designs onto jacket lapels.
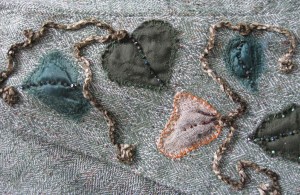
Close up of embellished lapel. In this case, I cut out the shapes I wanted and pinned them in place. I placed a small amount of batting under the shape to make it pop and needle felted around the edge of the shapes. I then finished my embellishments by beading around the edges and adding embroidery details.
I have embellished silk scarves with lovely novelty yarns. the system is the same- lay out your design and pin it into place and the go over it with the embellisher. Be sure to remove the pins before you move the fabric under the needles!
My biggest project was constructing my son and daughter-in-law’s aisle runner for their outdoor wedding. I started with 25 yards of muslin and appliqued a scalloped edge to each side using strips of stretch velvet as the outline of the scallop and filling in the crescent with gathered nylon poufs in autumnal colors. I then attached a wider backing of white felt to make it sturdy enough and heavy enough to stay in place. The only thread I used was to make buttonholes along the edges to make it easier to stake it to the ground.
At our Guild’s recent retreat, I decided to see if I could construct hats by using only the embellisher. I cut pattern pieces for the hats out of white commercial felt and took them along with a collection of thrums, handwoven scraps and handmade cords to see what I could do. What fun! I embellished the hat pieces with a variety of materials and then “sewed” them by felting the seams with the embellisher. Each hat got better than the previous one. Practice makes perfect! Some still need a bit of hand embellishment to make them into a finished piece, but the main work on the hats is done.
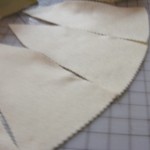
The pieces
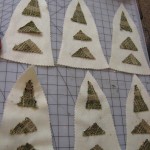
laying the design
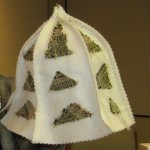
The felted hat
Now, you’re probably thinking that this machine doesn’t do enough to justify buying one. However, think of what else you can do with it. Maybe you would like to make throws or shawls with fringe on all four sides. By using the embellisher to ‘seal’ the edges where the fringe ends, you won’t have problems with the material unweaving along the edges and, better yet, you won’t have to spend hours doing the hand stitching that would otherwise be necessary. If you are sewing a garment with a ‘deconstructionist’ look, you can stop the fringed edging where you want by using the embellisher.
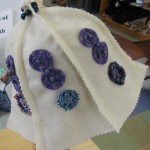
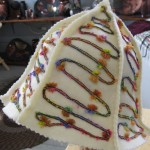
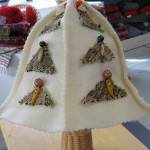
These three hats look the could go to a little girls tea party!
I have a friend who designs and makes drapey knit jackets. When she wants to give the garment a little shaping, she uses the embellisher to take small tucks. The tucks are almost invisible and they would be impossible to do as discretely using a sewing machine.
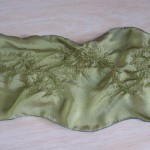
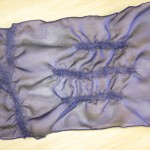
Also, consider using the machine to add texture as a design element. Using a sheer fabric, anything from cheesecloth to silk, you can add a design element by running the fabric under the needles. The needles snag the cloth and cause it to pucker a bit. All of the sudden, the flat material has developed an unexpected dimension.
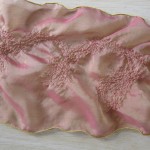
note the texture
I am finding the embellisher to be a useful tool in my studio and I keep finding other ways to use it. If you do a lot of sewing and decorative embellishing, you might find this machine a handy tool, also.