Remember Macrame? Most of us probably dabbled in it in the 70’s and then went on to other things. It turns out that macrame dates back to the 13th century when Arab weavers finished off their textiles with decorative knotted fringe. When the Moors invaded Spain, they brought this artful knotting with them and it spread throughout Europe.
The techniques were also picked up by sailors who knotted hammocks, belts and decorated knife handles, bottles and parts of the ships during their non-working time and used these articles for barter in ports, thus spreading the art to China and the New World.
Originally, macrame was done as open work with the knotting forming a lacy design with the fringe. In the early 20th century, a headmistress in a school in Italy, Valentina Cavandoli, remembered a technique learned from her grandmother of making a solid fabric using knots . She taught this technique to the children in her school.
Cavendoli is now the name of that macrame technique. If you’d like to try it, here are directions for making a brooch.
MAKING A BROOCH
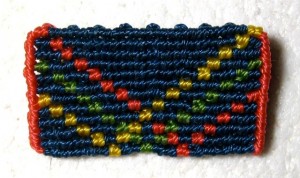
The Brooch
You can work at a table, or with a pillow in your lap. A clipboard not only holds the cords, but gives you a firm surface.
You will need a project board to hold pins or tape; about 8″ x 10″ should be large enough. For this you can use Styrofoam, foam core, ceiling tile, or bulletin board.
Bulletin board and ceiling tile materials need to be wrapped on back and edges with wide package tape, so they do not crumble, and a layer of cardboard, thin cork board, or thin foam on top of that, anchored with double stick tape on edges only, will help to anchor your pins.
You’ll want to limit the tape to edges to avoid sticky residue on pins.
Supplies
Straight pins-with ball heads for comfort-about 10 pins
Small sharp scissors,thread, needle and pin back or a safety pin to finish the piece
“Fray Check” to seal cut ends and secure finished edges
Bead cord: C-Lon nylon bead cord should be available at your local bead store or online from jewelsinfiber.com
Hemp or silk cord may be used instead.
Cavandoli Macrame comes down to the use of three knots: the half hitch, the overhand knot and the larks head.
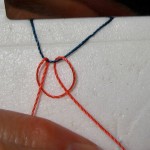
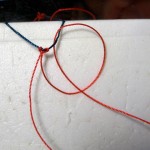
lark’s head knot
the first cord is attatched
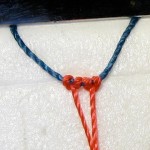
the first half hitch
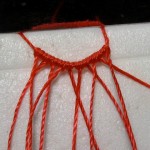
Five cords attached
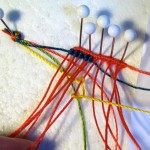
the first weft row
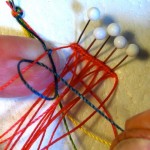
Beginning the first row
After attaching five cords to the base cord, pin the edge of the work to the work board by pushing the pins through the lark’s head knot to stabilize the work. The ends of the base cord are brought down and become part of the warp. This will give you 12 warp threads. Connect the weft colors to the side. Pickup your first weft color and do a double half hitch knot around each warp string. This will lock the knot in place. Following the pattern, pick up and use the other colors.

graph paper pattern warp direction–>
A small piece of graph paper and colored markers or pencils are useful to work out your design–note that each double half hitch is longer than it is wide, so this square grid paper, your piece will appear elongated in relation to your pattern.
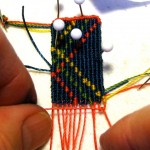
almost finished
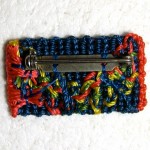
attaching the clasp

the almost end
For this pattern you will need to choose four colors of cord. There are several sources for additional instructions,supplies and interesting projects, jewelsandfiber.com and kristinebuchanan.com are two.
Length of cord should be calculated as follows: “warp” cords will be folded, so figure the length of the piece plus about 6″ tail, then double that.
To calculate the length of the piece, count your rows and figure 7 rows=1/2″. This piece, including beginning and ending rows,is just over 1 1/4″.
“Weft” cords need 1/2″ for each double half-hitch knot, plus about 6″ tail.
The background color is 153 knots, so it will take 82″- let’s say 7 feet. That length will get tangled easily, so you may use two pieces, about 40″ each. Each of the other colors will need about 8 + 6=14″.
I’ve used a bright color for the warp cords for contrast in the demonstration piece: six 14″ pieces, folded, will make your twelve columns.
You may use this pattern, or make your own, simpler or more complicated. A useful program for designing tapestry is Stitch Painter available from cochenille.com.
Editor’s note: Carol Sklar has been knotting jewelry for 20 years and she claims to learn something new with each piece.She sells her work at the Artisans’ Co-op in Bodega and online through Etsy. Below are some of her works.
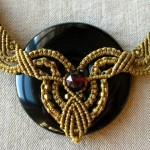
closeup of necklace medallion
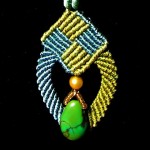
Earring

Necklace with coordinating earrings
Carol’s website is indivijewels.artfire.com