Making Clothing with Handwoven Fabric
Laura Carpender, Del Oro Spinners and Weavers Guild
Many years ago, another weaver watched me weaving a scarf on my rigid heddle loom. She made a comment that sent me down a new path in my weaving, “The rigid heddle is great for weaving scarves, towels and shawls, but you can’t make fabric for clothing with it.”

(Laura Carpender, courtesy CM Koos)
The challenge was issued. At the time, I knew no one who made cloth for clothing on a rigid heddle. I have seamstress training from both my grandmothers, and I know what to look for in fabric for clothing, so I was ready to make fabric on the rigid heddle.
With some failures and successes, I have developed my approach to using handwoven fabrics. I usually start with an idea such as a colorway, a pattern, or a random piece of fabric I already wove. My concept is that we spend a lot of time weaving the cloth, so we should spend at least as much time making the garment.
Since color is an individual decision, I will not go into my approach here. I will just say that inspiration is everywhere.
Pattern choice is another matter. I look for three things when choosing a pattern. First, simplicity. If a pattern is too complicated, I may not finish the project. I look for minimal seams, darts and fitting. Second, I like a pattern with one or two unique features. Perhaps an interesting neckline, a sleeve with a twist, etc. Third, I look for possibilities: details to add that can enhance the garment and make it unique.
Next is fitting the pattern. There is an old saying “measure twice, cut once.” I think you can never measure enough. Check and recheck is my motto. Looking at the pattern dimensions is a good place to start. Bust size is the most common measurement used by pattern makers, but we are not all equal. If your bust is 36 inches, the pattern hips may be 36 inches while your hips are 40 inches. What to do? Best bet is to take your largest measurement, be it hip or bust, and use that size pattern. It’s much easier to take in an area than to increase it.
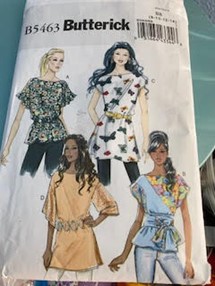
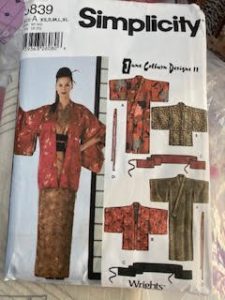
Laura’s go-to patterns
Pinning the paper pattern together along the seam lines and then slipping it on to see where it pulls is okay, but let’s face it, paper doesn’t drape, so this is a very inaccurate way to fit the pattern. My preferred method is to take an old sheet and cut out the basic pattern pieces. Then fit these fabric pieces to your body or mannequin. Then you can save this cloth pattern for use next time.
Next comes pinning the cloth pattern at the seam lines and then fitting onto your body or mannequin. Now you can easily make the adjustments where needed. Be sure to allow for
“ease.” Ease just means that there is enough room or give in the garment for ease of movement. And be sure you are using the seam lines when pinning because nothing hurts more than sewing a garment and discovering it is too small. If you are sewing the garment for yourself, it is very helpful to have a friend assist with the fitting. Two sets of eyes can also spot possible problem areas.
Now is the time to make adjustments to your paper pattern pieces. Are you ready to cut out the pattern? NOT yet.
I always zigzag around each piece to prevent raveling. I found that the serger has a tendency to stretch the fabric and makes for sagging seams. If the fabric is unstable, I will zigzag and use a straight stitch to keep seams from stretching.
…. Stay tuned for Laura’s next installment in the November issue of CNCH.net
Did this article whet your appetite for weaving for garments? I know I sure got excited! I am looking through my stash so I can weave a tunic!
-ed.