Make A Book Tutorial
Cathy M Koos
Make no mistake – books and I have carried on a decades-long love affair. New books, old books, 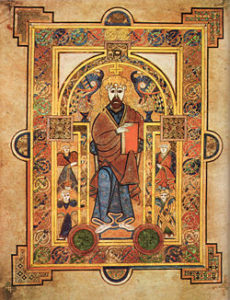 softcover or hard. The smell of old books is like the finest perfume. When I was in college, my most treasured possession was a library card for the Philadelphia Free Library – one of America’s oldest. When my sister and I went to Ireland a few years ago, my only demand was to visit Trinity Library in Dublin and see the Book of Kells. (pictured right, courtesy Wikipedia)
Books are magical beings. Between those covers lie stories that allow you to escape, immerse, dream, learn. There is nothing quite so fine as time spent leafing through books in libraries, new and old bookshops, even thrift stores offer a treasure trove of tomes.
So, it wasn’t too huge a leap for me to go from reading and collecting to making my own books. I still have the very first book I made when I was a senior in high school. It was the first year they let girls take shop class and I was ecstatic. We had proper equipment: presses, chop cutters, cover cloth, fancy paper, the works. Now my much simpler equipment consists of clamps, a paper guillotine, a healable cutting mat, box cutters, Exacto knives, and loads of papers and ephemera.
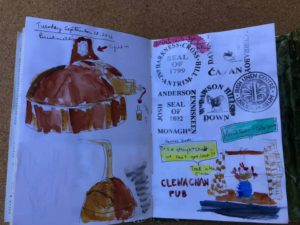
While they are pretty, I steer away from junk journals; my focus is mainly travel journals, sketching journals and project records. The travel journals are bursting with content collected along the journey. I have a little traveling kit consisting of a mechanical pencil, glue stick, tiny scissors (TSA has not taken them away yet….), and either watercolor pencils or a small pan of watercolors and a couple brushes. Lately, I have been favoring brushes that have a built-in water chamber, so I don’t have to deal with tiny cups of water. 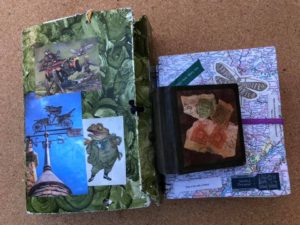
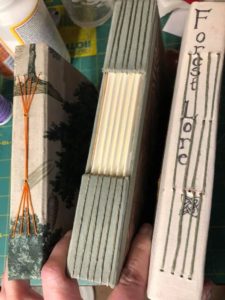
I always name my trips when I travel. The well-worn book on the left is “Toad’s Wild Ride,” our trip to Ireland hence named for the left-hand driving, but that is a whole other story for another day. The bottom book on the right is an ongoing journal of trips to Pennsylvania, with a PA map for the cover. The little black book is empty at the moment, waiting for Covid to go away and a new adventure to begin.
Right now, though, I need a blank book for an online botanical illustration class in February, so come along with me while I make my new book.
First, determine the size. Size can be driven by a lot of factors – do you want something you can tuck in your bag or under your arm? Weight can be a factor if it’s a travel journal. I made that mistake with the Toad’s Wild Ride journal I made for our trip to Ireland. One week in and that thing weighed a ton what with all the stuff I glued in there — maps, entry tickets, boarding passes, brochures. I wasn’t driving, so I was drawing, painting, and gluing in the back seat. By the second week, I was leaving my journal in the car more and more often, but it is a wonderful collection of memories I look at often.
For my post-Ireland travel journals, I make what is called “Faux Midori” with removable signatures that I can tuck into my day bag. (Google for ideas) The signatures are held inside the book cover with elastic bands, rather than sewn in. For this online class, however, I won’t need to consider portability so everything will be sewn in.
Back to size. In this time of essential-only travel and home isolation, I scrounged through my stash o’ stuff for covers and innards. A couple cautions on covers – avoid corrugated cardboard and posterboard at all costs, as it will not hold up. While binders board or Masonite are some of the preferred products, take a look around your house for something like cracker or cereal boxes. You can glue together multiple layers, wrap in saran wrap, and weight the layers with a stack of books overnight while they dry, to prevent warping. And there is always ordering online, but I was impatient.
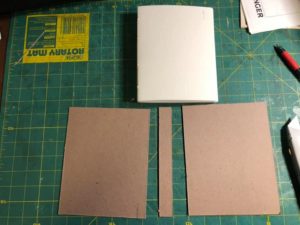
Another scrounging possibility is an old book that isn’t a special book, or first edition, and you don’t care about it. (think trash fiction from the thrift store.) Cut the covers off and reuse them for your journal. Of course, recycling covers will drive the size of your book, so bear that in mind. For my book, I harvested the chipboard backing from a pad of watercolor paper.
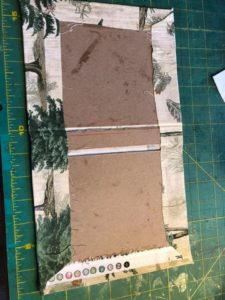
I cut two pieces 5 ¾ “by 7 ¼” and a spine measuring 5 ¾ “by 1 ¼”. The cover size, in this case, was driven by the paper I had on hand.
Next is to find an outer cover. Some ideas – commercial bookpaper, a Fed Ex Tyvek envelope (waterproof!), a map, scrapbook paper, wrapping paper, a gift bag, or fabric. I chose a pretty piece of fabric in my stash. If you go that route, you will need to put a backing on it to keep the glue from seeping through. I usually use fusible interfacing or a heat bonding material to make this type of bookpaper.
If the book will get a lot of wear and you use something like a map, consider coating it with Modge Podge or spray-on acrylic product.
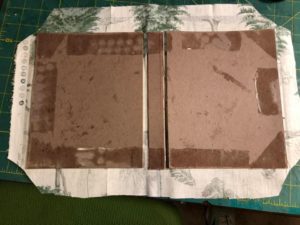 Lay out your previously cut binders board (or similar scrounged cardboard) on the wrong side of your cover material. I wanted to fussy cut the fabric, so a beautiful tree was centered on the front cover. Be sure to check your orientation if the fabric or paper has a one-way design (been there, done that) and glue those down with something like Fabri-Tek glue.
Next, glue on end papers on the inside of each cover board. Use a bone folder or similar tool (a 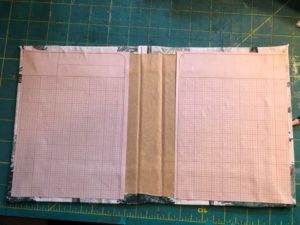 teaspoon, ruler, credit card etc.) to smooth out. End papers can be scrapbooking paper, marbled paper, wrapping paper or the like. Cover the assemblage with plastic wrap or foil and weight it down overnight. Don’t rush this process – it makes a huge difference in the finished product. All those ripples you see will flatten out.
Next, make the signatures. Of course, you should sign your book – it is a work of art, after all. But in the bookbinding world, a signature is a group of folded papers that will be fastened into your book. Take a close look inside the spine of a hardcover book and you will see these bundles of folded pages sewn into the spine. Most paperback books, on the other hand, are single sheets of paper glued into the spine.
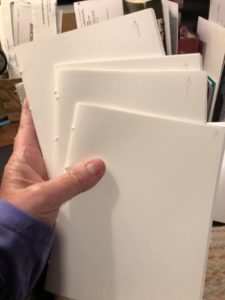 For this illustration class, I wanted a sewn binding, so I used a combination alternating sketch paper and watercolor paper. I used my guillotine and cut the papers 11 x 7 and folded in half (5 ½ x 7”) to create the signature. I alternated two sheets of sketch paper and three sheets of watercolor in each signature, making 4 signatures for a total of 20 “sides” per signature or 80 total pages.
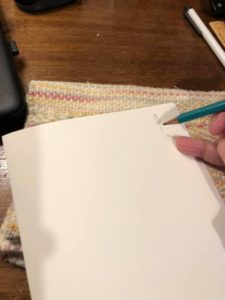 I made a punching jig from a spare piece of copy paper, making punch marks 1” in from top and bottom, and two marks at 2.5” and 4.5”. I don’t have a proper punching cradle, so I roll up a hand towel for cushioning and to protect my table. Open up each signature to the center and lay your paper punching jig inside. Use an awl or some other sharp device like a pushpin and punch your stitching holes.
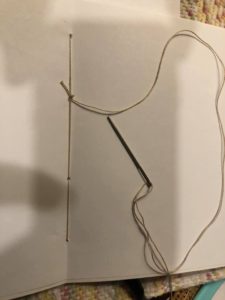
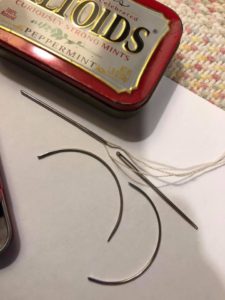 (examples of sewing needles)
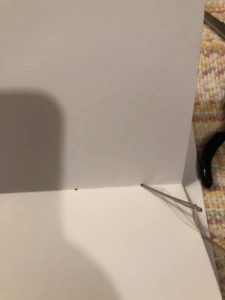 (start to stitch)
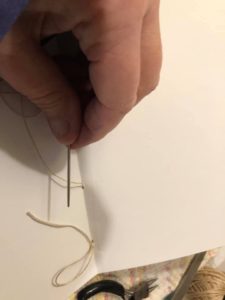
Once all the signatures are punched, using a tapestry needle, sew each signature together using linen thread (preferred) or something sturdy like craft thread. I like to make a slip knot at the tail, start at the bottom hole on the inside, stitch to the outside, come inside at the next hole and catch that slip knot and snug it down, then in and out of each of the 4 holes, creating a running stitch. Knot on the inside when stitching is completed.
After all signatures have been stitched, set them aside. Open out the covers flat. Using your stitching jig, mark the location of the 4 signature holes onto the spine. To follow my starburst stitching pattern pictured below, at the top marking, make 4 evenly spaced marks—one for each signature. At the second mark from the top, make one mark centered. At the third mark, repeat, one mark centered. At the fourth mark, make 4 evenly space marks. Get your folded towel and place it underneath the spine and punch those marks.
Spine stitching ideas
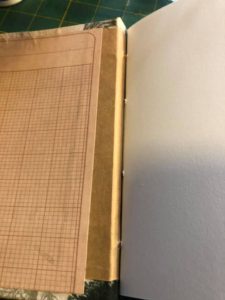
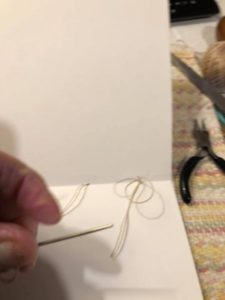
(first signature sewn in)
Grab a signature and start sewing. Again, make a slip knot and start on the inside of the first signature, stitch through the top hole of the signature and into the left-most punched hole of inside the spine. Your needle and heavy thread are now outside the book cover. Insert the needle into the second, single hole. Back through the signature’s second hole. Then back out the signature’s third hole and into the single hole of the spine. From the outside of the spine, insert your needle into the leftmost hold of the spine.
Continue this pattern with each additional signature until all 4 signatures are attached to the spine. During each signature attachment, be sure to gently snug up the thread. When all signatures are attached, snugly tie off the stitching thread and neatly cut.
Give your book a final weighting with some heavy books and you are ready to journal!